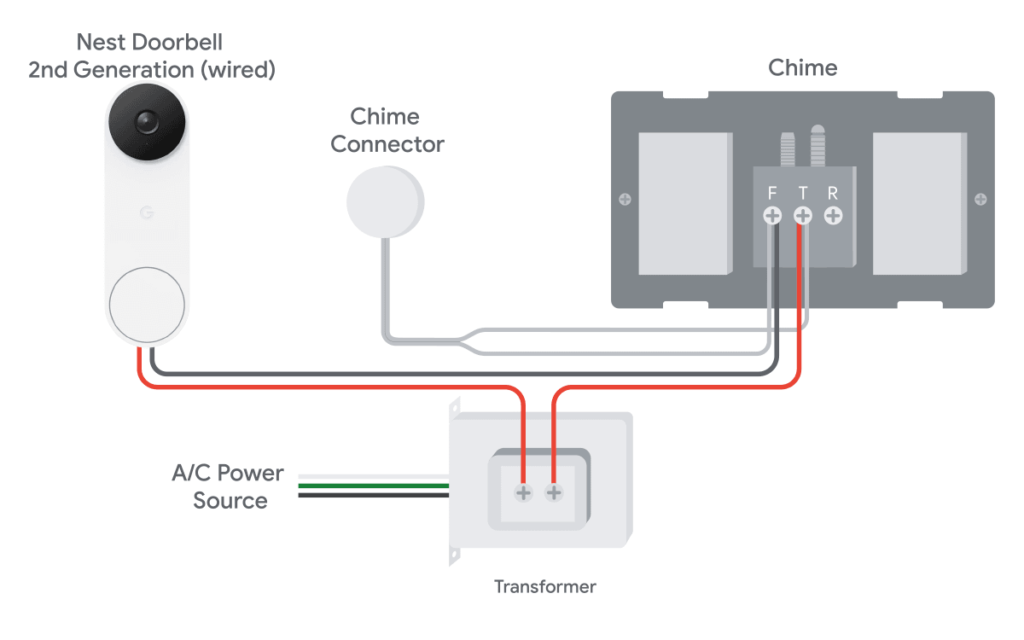
How to install Google’s Nest Doorbell (wired, 2nd gen)
Windows 2016 RDP Licensing Problem
August 28, 2023EagleSoft Closing Option Fix
February 3, 2024Start here if you have a new Google Nest Doorbell (wired, 2nd gen), or if you’ve removed your doorbell from the app and want to add it back.
You need the app to connect your doorbell to Wi-Fi and get recorded video, so you should always use the app as your primary guide to set up and install your doorbell.
Here’s a brief overview of steps to get started, along with some important troubleshooting.

More installation help
You can find steps to install the older model of Nest Doorbell (wired) and Nest Doorbell (battery) in our Help Center.
For help with battery-powered or wired installation for the Nest Doorbell (battery), go to our Install Nest Doorbell (battery) article.
Watch the installation video
For a quick overview of how to set up and install your Nest Doorbell (wired, 2nd gen), watch our video tutorial.
1. Check compatibility and voltage requirements
While the Nest doorbell can replace most wired doorbells, there are some cases where the doorbell system either doesn’t provide enough power or provides too much power. You should check that your current doorbell can be replaced by the Nest doorbell.
Check doorbell system compatibility with Nest doorbell
2. Check that you have everything for installation
3. Turn the power off to your doorbell system
4. Remove your old doorbell
5. Connect your doorbell to the app
6. Troubleshoot if needed
7. Use your doorbell
Connect power wires to Nest Doorbell
- Before you connect the wires make sure they are clean.
- Connect the power wires to the wire connectors.
- It doesn’t matter which connector you attach a wire to.
- Press down on the release tabs to insert the wires into the connectors.
- If you see exposed wire, remove the connectors and trim any excess wire.
- Important: Don’t let the connectors touch the backplate. This can cause an electrical short and damage the doorbell. Make sure that they only touch the screws. Tighten the screws to secure the connectors.
- Make sure the wires point down, not up, so the extra wire can be tucked back into the wall.
Without the connectors
- Before you connect the wires to the screws, trim the wires and the insulation so only ¼ inch of wire is exposed.
- Bend the wires clockwise into a hook shape and attach to the screws.
- Important: Don’t let the wires touch the backplate. This can cause an electrical short and damage the doorbell. Make sure that they only touch the screws. Tighten the screws to secure the wires.
- Make sure the wires point down, not up, so the extra wire can be tucked back into the wall.